
| Tweet |

Custom Search
|
|

|
||
 TM 9-2330-380-14&P
Interior Electrical Receptacle (M129A4 Registration Numbers NX0RKB And Subsequent)
This task covers:
a. Wallplateremoval
b. Electricalreceptacleremoval
c. Electricalreceptacleinstallation
d. Wallplateinstallation
Initial Setup:
Tools/Test Equipment:
EquipmentConditions:
General mechanic's tool kit (item 01, Appendix B)
110-volt power source disconnected.
WARNING
Make sure all electrical power is disconnected before performing any maintenance on the electrical
system. Serious injury or death may result if proper precautions are not taken.
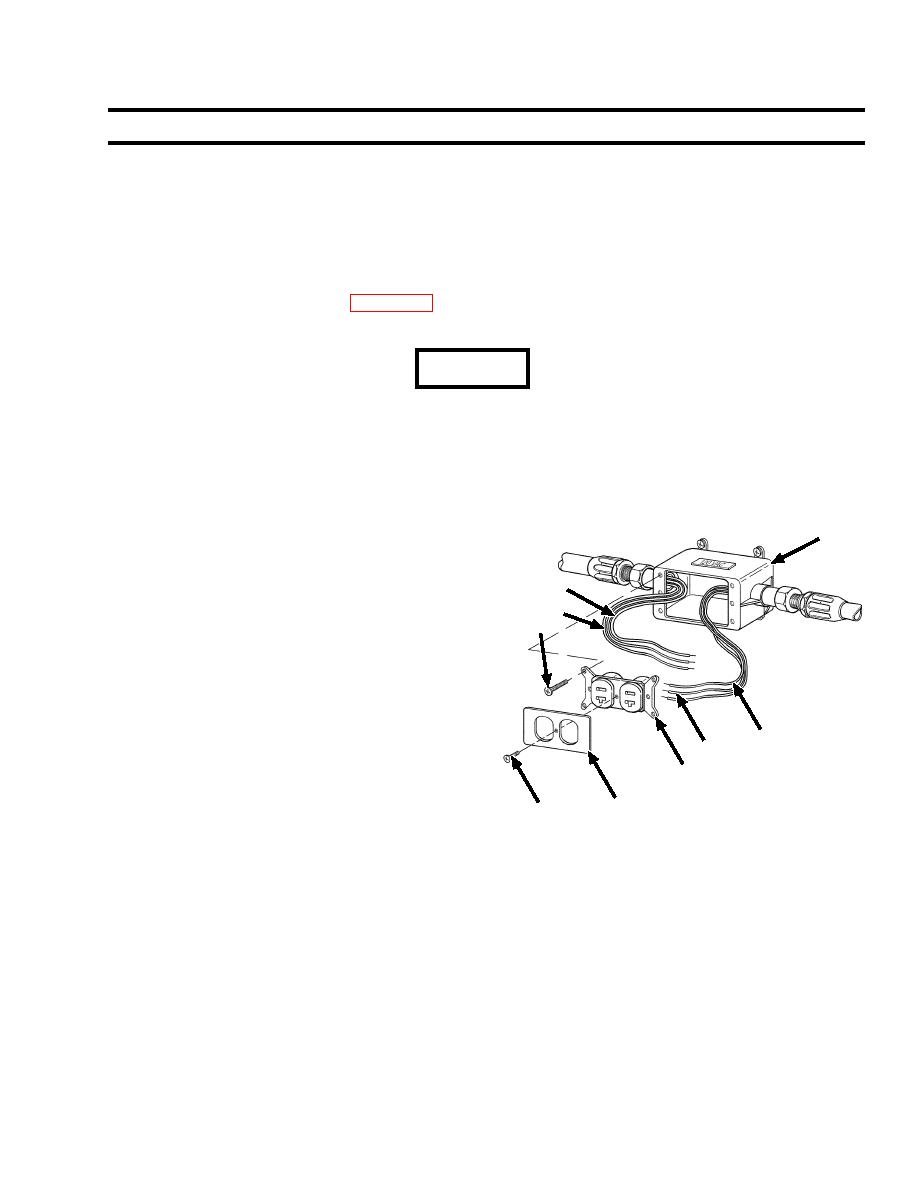
a. Wall plate removal
1. Remove screw (1) and wall plate (2).
6
b. Electrical receptacle removal
1. Remove four screws (3) from electrical
5
receptacle (4).
5
3
2. Remove six wires (5) from electrical receptacle (4).
3. Removal electrical receptacle (4) from electrical
junction box (6).
c. Electrical receptacle installation
5
5
1. Install six wires (5) on the electrical receptacle
(4) as follows:
4
a. Insert the black wires into the two holes under the 1
2
dark screws on each side of the receptacle and tighten screws until both wires are secure.
b. Insert the white wires into the holes under the light screws on the opposite side of the receptacle
and tighten until both these wires are secure.
c. Wrap the green wires around the grounding screw protruding from the corner of the receptacle and
tighten screw until both the green wires are secure to the receptacle.
2. Push electrical receptacle (4) into electrical junction box (6) and install with four machine screws (3).
d. Wall plate installation
1. Install wall plate (2) with machine screw (1).
Follow-on maintenance: None
|
||
|
||


