
| Tweet |

Custom Search
|
|

|
||
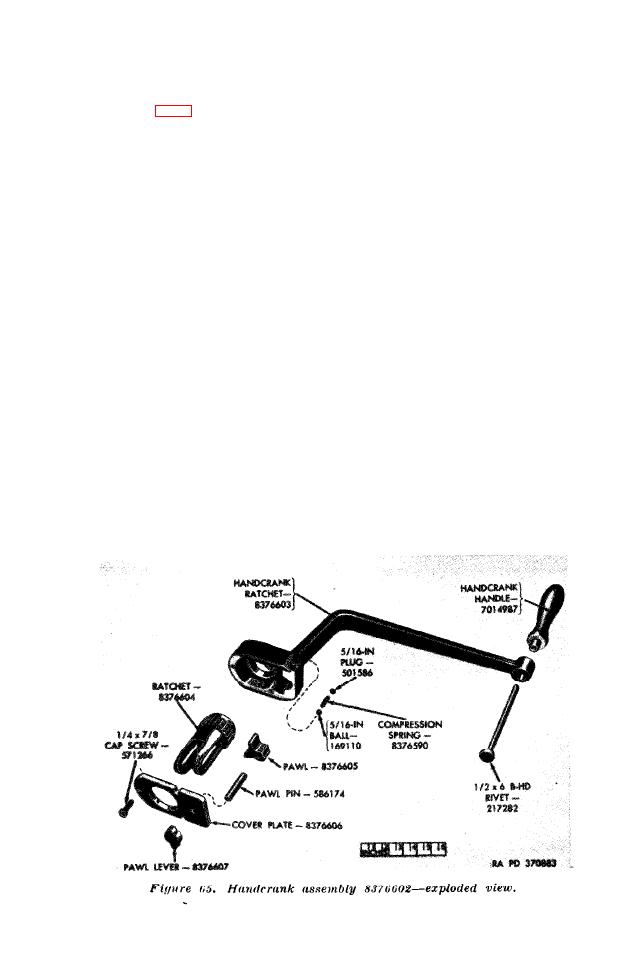 100.
Handcrank Assembly
a.
Removal. Refer
to
paragraph
68a(1).
b. D i s a s s e m b l y .
(1) Remove plug, spring, and ball from handcrank ratchet.
Pull
pawl
lever
from
pawl
pin.
Remove
three
cap
screws which secure cover plate to handcrank ratchet
Remove ratchet and pawl
and remove cover plate.
pin with pawl attached from handcrank ratchet. Mark
position of pawl on pawl pin and drive pawl pin out
of pawl.
(2) If handcrank handle is damaged, file or grind peened
end of binding head rivet and remove rivet and handle
from handcrank ratchet.
c. Cleaning. Use mineral spirits paint thinner or dry-cleaning
solvent to remove grease from parts.
Repair. I n s p e c t h a n d c r a n k
for
cracks. If
d.
Inspection
and
Replace a
cracks
are
apparent,
replace
handcrank
ratchet.
broken
or
worn
handcrank
handle.
Check
for
a
broken
or
ineffective
compression
spring
and
replace
if
necessary.
Ratchet
and pawl should be free of nicks and burs. Remove burs with
a fine file and finish with a fine abrasive. Replace excessively
worn
parts.
Inspect
all
exterior
surface
for
chipped
paint.
Scrape loose paint to metal and repaint.
TAGO 1321B
149
|
||
|
||


