
| Tweet |

Custom Search
|
|

|
||
 TM 9-2330-380-14&P
This task covers:
a. Removal
b. Cleaningandinspection
c. Installation
Initial Setup:
Tools/Test Equipment:
EquipmentConditions:
General mechanic's tool kit (item 01, Appendix B)
Power source disconnected.
Materials/Supplies:
Dishwashing, soap (item 17, Appendix E)
Rags (item 14, Appendix E)
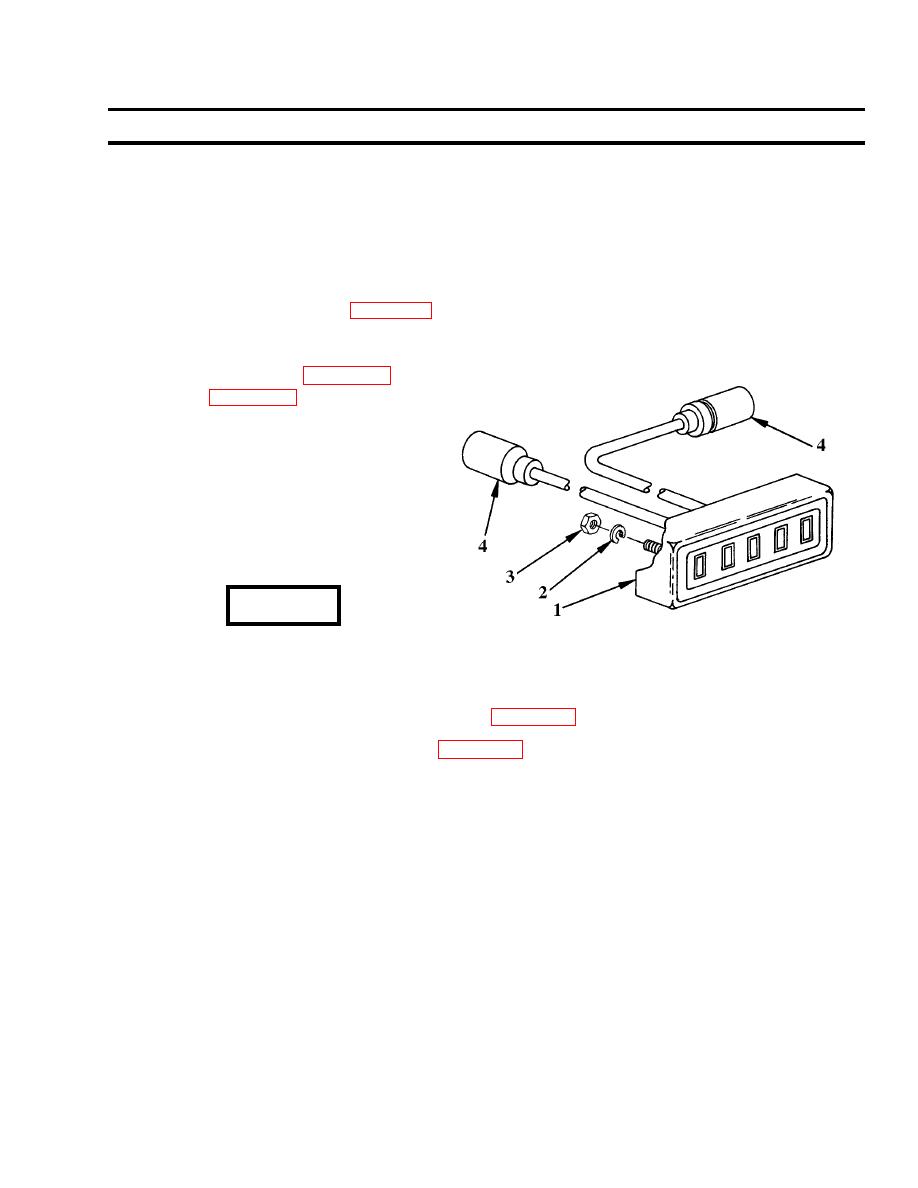
a. Removal
1. Disconnect electrical connectors (4).
2. Remove nuts (3) and washers (2) and
light (1).
b. Cleaning and inspection
CAUTION
Do not use dry cleaning solvent. It will damage
the body of the light.
1. Clean light, using clean water and soap (item 17, Appendix E) solution.
Dry thoroughly with clean rags (item 14, Appendix E).
2. Check wiring for damaged or worn insulation.
3. Inspect body for cracks, dents, warpage and cracked or broken lens.
4. Make sure all parts are in good condition and will make good electrical contact and watertight
connections.
5. Replace light if defective.
c. Installation
1. Connect electrical connections (4).
2. Position light (1) and secure with nuts (3) and washers (2).
3. Test light by placing towing vehicle light switch in the BLACKOUT position and then operating the
proper switch, brake pedal or turn signal lever.
Follow-on maintenance: None
|
||
|
||


