
| Tweet |

Custom Search
|
|

|
||
 TB 9-2330-330-14&P-1
INITIAL INSTALLATION (continued)
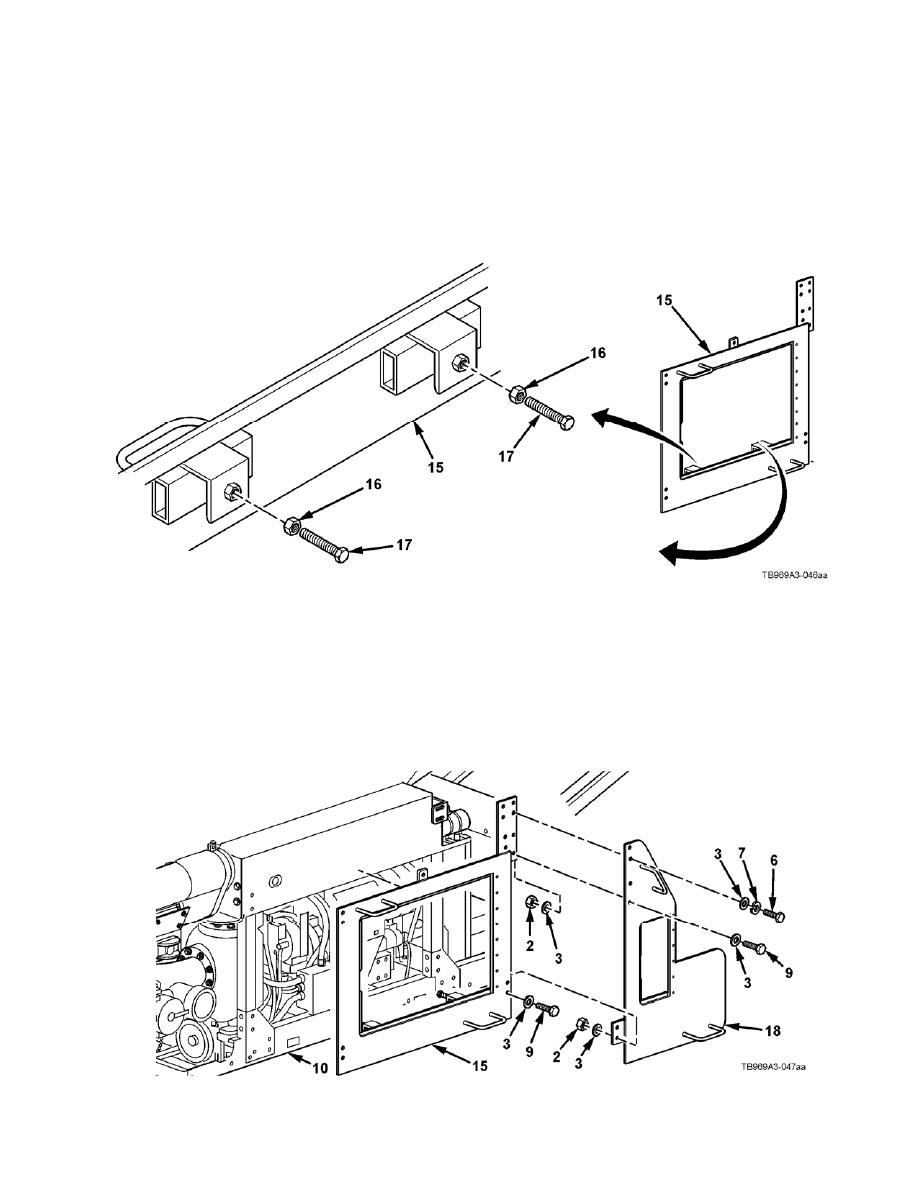
NOTE
Do not fully tighten capscrews or clamping screws until armor is properly
positioned and aligned on engine compartment shroud.
8. Install two capscrews (17) and two jam nuts (16) on front panel B (15). Do not fully tighten
hardware.
9. Position front panel B (15) on engine compartment shroud (10). Do not fully tighten hardware.
10. Position front panel A (18) on front panel B (15). Adjust front panel A (18) to align with holes in
front panel B (15) and install with two capscrews (6), two lockwashers (7) and two
flat washers (3). Do not fully tighten hardware.
11. Install eight flat washers (3), four capscrews (9), and four self-locking nuts (2) on front
panel A (18) and front panel B (15). Do not fully tighten hardware.
4-9
|
||
|
||


