| Tweet |

Custom Search
|
|

|
||
 TM 9-2330-380-14&P
4-93. Unloading Procedure (XM1063 Only) (cont'd)
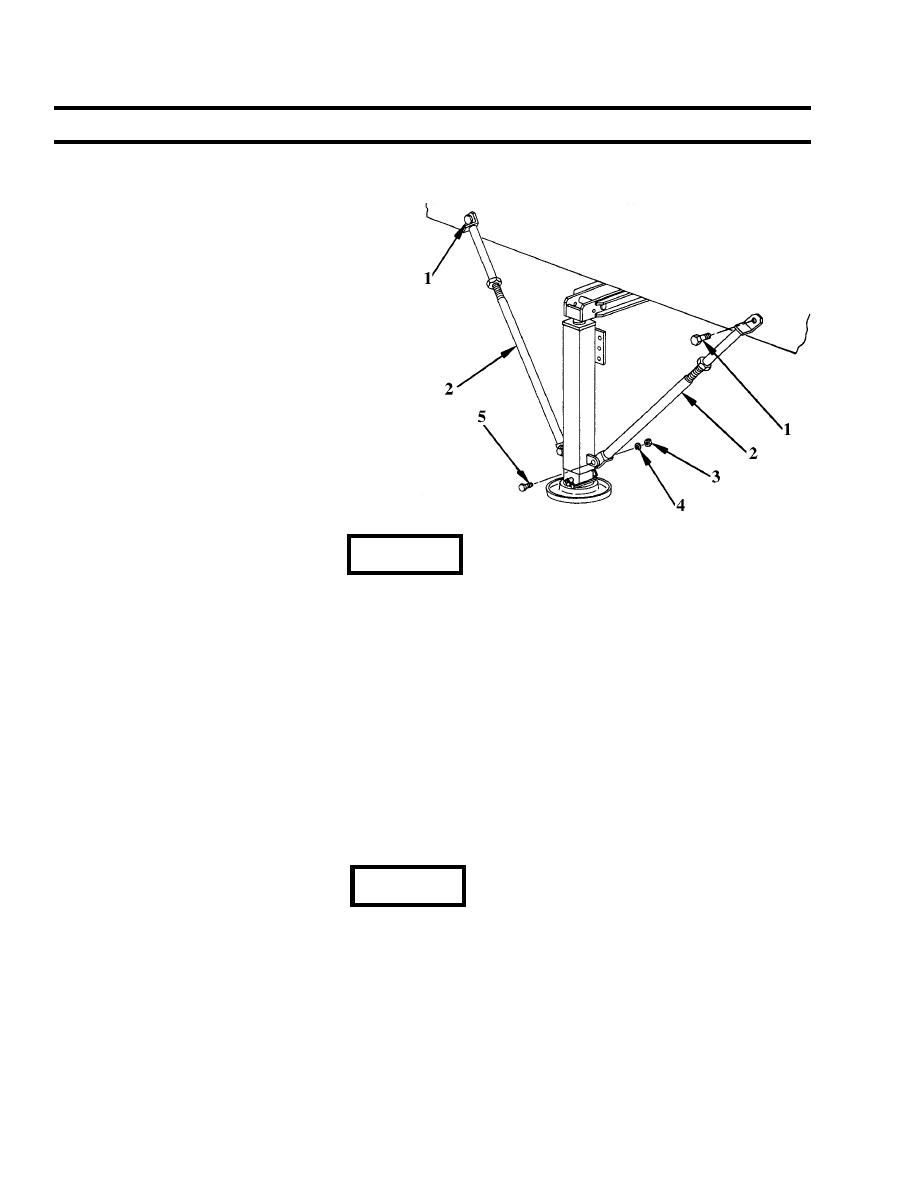
17. Match hole at lower end of each lifting brace (2)
with hole at bottom of each jack. Adjust length of
lifting brace as required by turning it
counterclockwise to extend it or clockwise to
shorten it.
18. Secure bottom of each brace (2) to each jack
with screw (5), washer (4) and nut (3).
WARNING
Make certain lifting jacks are perfectly straight. If shifting occurs, stop operation at once and
reposition lifting jacks.
19. Working as a team, turn jack cranks clockwise to raise van body rear end (both sides at same time) to
a height permitting installation of the dolly from rear.
20. Remove K-Loader.
21. Remove dolly attaching hardware from holes in dolly frame.
22. Insert dolly into position from the rear. Lower rear end of van body toward dolly. Make sure holes in
dolly match holes in van body. Working as a team, secure dolly with existing hardware.
23. Remove lifting jack braces and stow braces on front of dolly. Set aside hardware removed from
bottom of braces for reinstallation of leveling jack braces. Place OVE screws in interior of van body.
WARNING
Leveling jack is heavy. Two persons are required to remove/install leveling jack.
24. Turn cranks of lifting/loading jacks counterclockwise to lower legs and clear guides from holes in
lifting arms. Remove jacks. Install as leveling jacks at rear of dolly. Reinstall braces using existing
hardware.
25. Pull lock pins from lifting arms, swing arms inward 180 degrees and lock in position with lock pins.
4-148
|
||
 |
||