
| Tweet |

Custom Search
|
|

|
||
 off deformed ends of two hex-head bolts (A-12) that
secure leaf clip to springs, and end of center bolt.
Remove
two
hex
nuts
(A-11)
from
hex-head
bolts
(A-12)
and
hex
nut
(A-19)
from
center
bolt
(A-17).
Pull hex-head bolts through leaf clips (A-13) and clip
Use heat to open formed leaf clips.
spacers
(A-20).
Do not heat clips unnecessarily. Gradually relieve ten-
sion on clamp, press, or vise. Separate leaves.
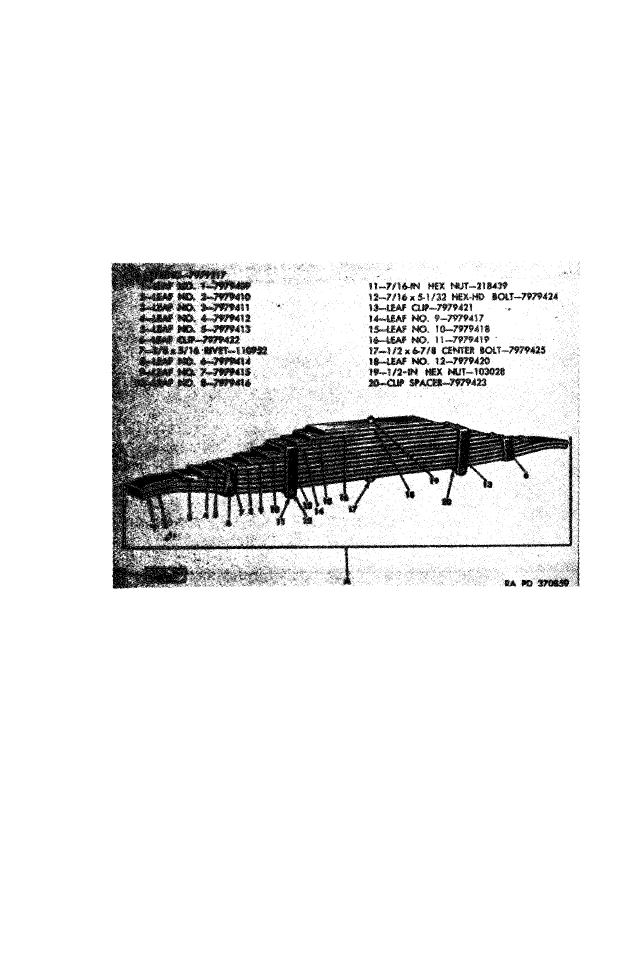
Figure 56. Spring 7979217-assembled view.
Cleaning. Clean each leaf with mineral spirits paint
(3)
thinner or dry-cleaning solvent. Brush or buff rust
and corrosion from leaves.
( 4 ) Inspection
and
repair.
Inspect each leaf for cracks
or breaks. Replace defective leaves. Make sure rivets
hold clips tightly and check leaf clips for cracks. Cut
out
and
replace
any
defective
3/8
x
5/16
(button-
head)
rivets.
( 5 ) A s s e m b l y . Assemble
leaves
in
proper
order,
starting
with lower (larger) leaf No. 1 (A-1). Aline holes for
center bolt and insert 1/2 x 6 7/8 center bolt (A-17)
into
hole
in
leaf
No.
1
and
through
holes
in
other
leaves Nos. 2 through 12. Clamp leaves together with
arbor press, vise, or C-clamp, and install 1/2-inch hex
TAGO 1321B
127
|
||
|
||


