TM 10-3930-665-13&P
Section II CHANGING THE BELT
3-4 INSTALLING (REPLACING) THE BELT
If the replacement of the conveyor belt becomes necessary, run the conveyor until the splice is centered on the upper bed
of the conveyor. Lockout power to the conveyor using the stop button. Remove tension from the belt by loosing the take-
up pulley on both sides. Next remove the lacing pin. Next remove the lower belt guard and the chain guard Loosen the
drive chain by removing the lower tension sprocket and the master link. Remove the old belt by pulling through the head
end. Once this is accomplished, the new belt can be threaded through the conveyor (See Figure 3-3). One side of the belt
will be smooth, thread the belt so that this side is facing down. Thread the belt from the tail end of the conveyor.
FIGURE 3-3.
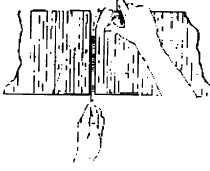
Once the belt has been threaded through the conveyor,
pull the ends together and insert lacing pin. (See
Figure 3-4).
It is important to maintain the proper tension on the belt
so that it will not slip when carrying the rated load. Belt
tension should be adjusted with the take-up pulley (See
Figure 3-3). Make certain to keep pulleys square with
bed by moving both take-up bolts an equal amount.
Replace the drive chain, reinstall the master link, and
replace the tension sprocket. Replace all machine
guards.
FIGURE 3-4
3-3
|
|


