
| Tweet |

Custom Search
|
|

|
||
 TB 9-2320-273-13&P-1
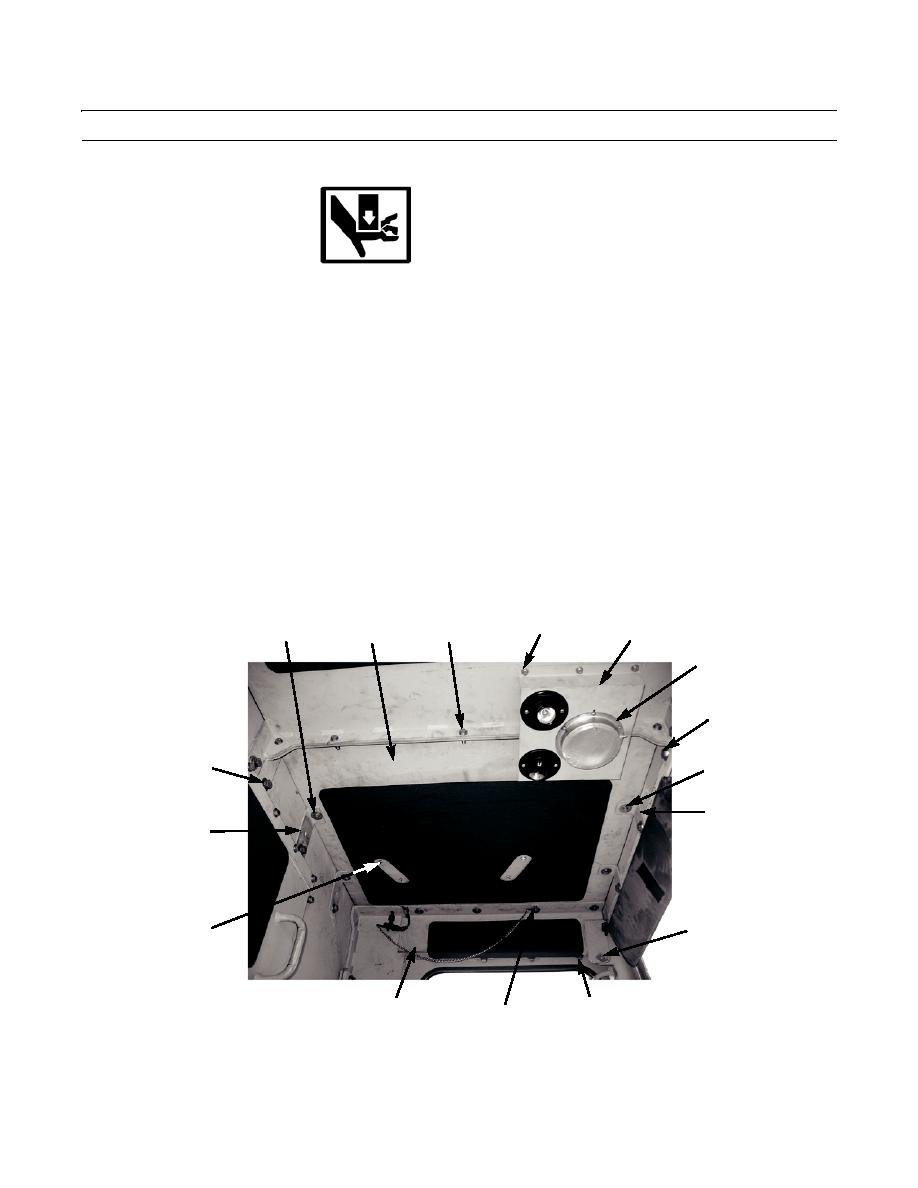
ROOF ARMOR REPLACEMENT - CONTINUED
0023 00
INSTALLATION
WARNING
Use extreme caution when handling heavy parts. Provide adequate support and use assistance during proce-
dure. Failure to follow this warning may cause injury or death to personnel.
1.
With assistance, install roof armor (7), washer (17), new lockwasher (16), and bolt (15) on vehicle.
2.
Install washer (3), new lockwasher (2), and bolt (1) on roof armor (7).
3.
Install five bolts (8), washers (9), and new locknuts (10) on center of roof armor (7).
4.
Install two brackets (37), four washers (6), new lockwashers (5), and bolts (4) on roof armor (7).
5.
Install two brackets (21), four washers (20), new lockwashers (19), and bolts (18) on roof armor (7).
6.
Install header (32), washers (31), new lockwashers (30), and four bolts (29) on vehicle.
7.
Install washer (23), bolt (22), washer (25), and new locknut (24) on header (32).
8.
Install four washers (28), new lockwashers (27), and bolts (26) on header (32).
NOTE
Bolts in following step secure roof mount A/C unit to cab roof.
9.
Install four washers (34), bolts (33), washers (35), and new locknuts (36) on roof armor (7).
10.
Connect three dome light connectors (14) on dome light assembly (13).
11.
Install dome light assembly (13), six washers (12), and bolts (11) on roof armor (7).
4,5,6
11,12
7
8,9,10
13
14 (HIDDEN)
15,16,17
1,2,3
18,19,20
21
37
22,23,24,25
33,34,35,36
417-249
26,27,28
32
29,30,31
END OF WORK PACKAGE
0023 00-4
|
||
|
||


