
| Tweet |

Custom Search
|
|

|
||
 TM 9-2330-380-14&P
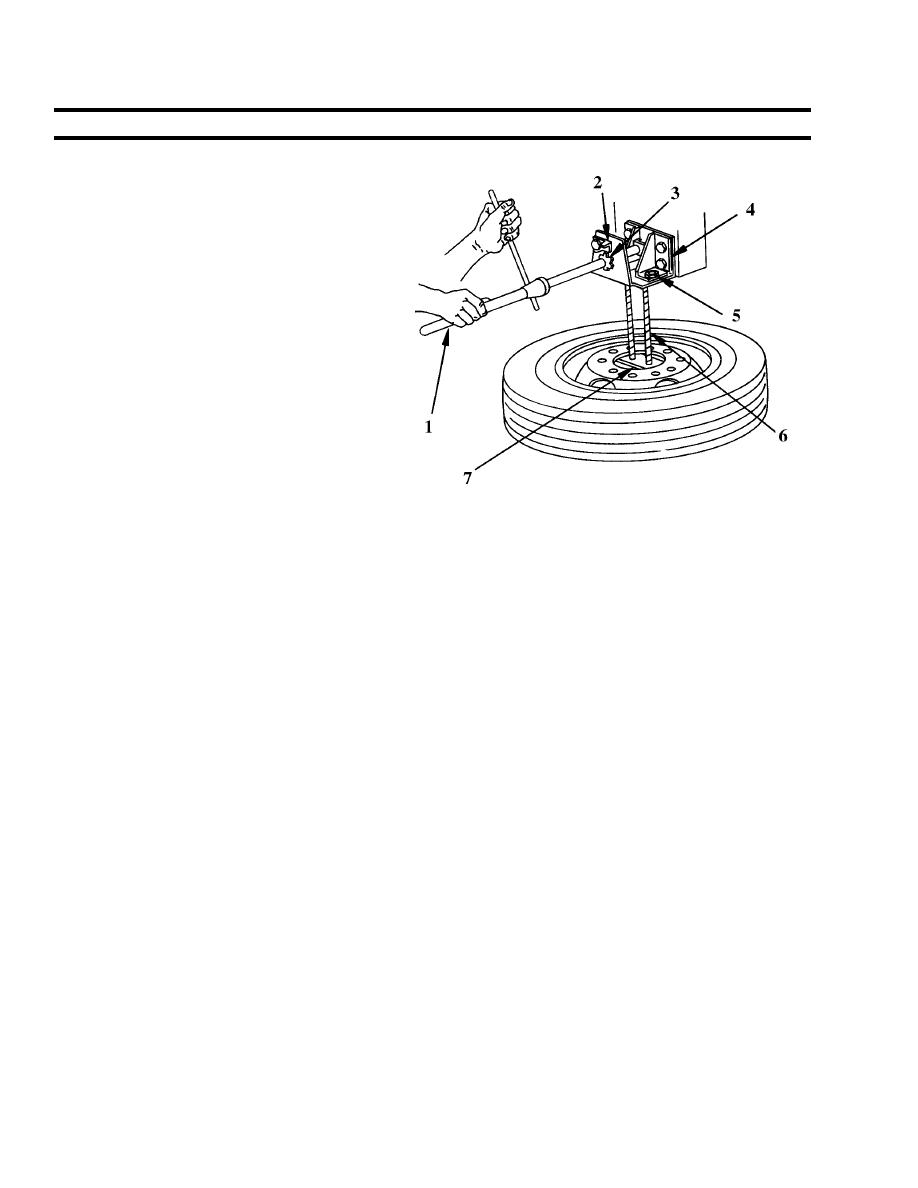
a. Removal
1. Use wheel nut wrench (1) and remove two
special wheel nuts (5) securing wheel to
upper member (4).
2. Position wheel nut wrench (1) on the nut at
outer end of ratchet wheel (3) on which
wire rope (6) is wound.
3. To lower wheel, release pawl (2) from
ratchet and turn wrench counterclockwise.
Continue turning counterclockwise until
wheel rests on ground.
5. Let pick-up member (7) drop away from
wheel.
6. Remove pick-up member (7) through
center hole in wheel.
b. Installation
1. Lower pick-up member (7) to ground (refer to steps 1 through 5 of removal procedure).
2. Rotate pick-up member (7) until it aligns with wire rope (6). Slide wire rope (6) and pick-up member
through center hole in wheel.
3. Rotate pick-up member (7) so that it is at right angle to wire rope (6).
4. Align securing bolts on pick-up member (7) with any two holes in wheel.
5. Position wheel nut wrench (1) on nut at outer end of ratchet wheel (3).
6. Set pawl (2) in contact with ratchet and turn wrench (1) clockwise to raise wheel and tire.
7. As wheel moves up to upper member (4), align studs on pick-up member (7) with holes in upper
member (4).
8. After wheel is tight against upper member (4), install and tighten nuts (5) with wrench (1).
|
||
|
||


