
| Tweet |

Custom Search
|
|

|
||
 TM 9-2330-330-14&P
VAPOR INTEGRITY TEST--Continued
0168 00
10.
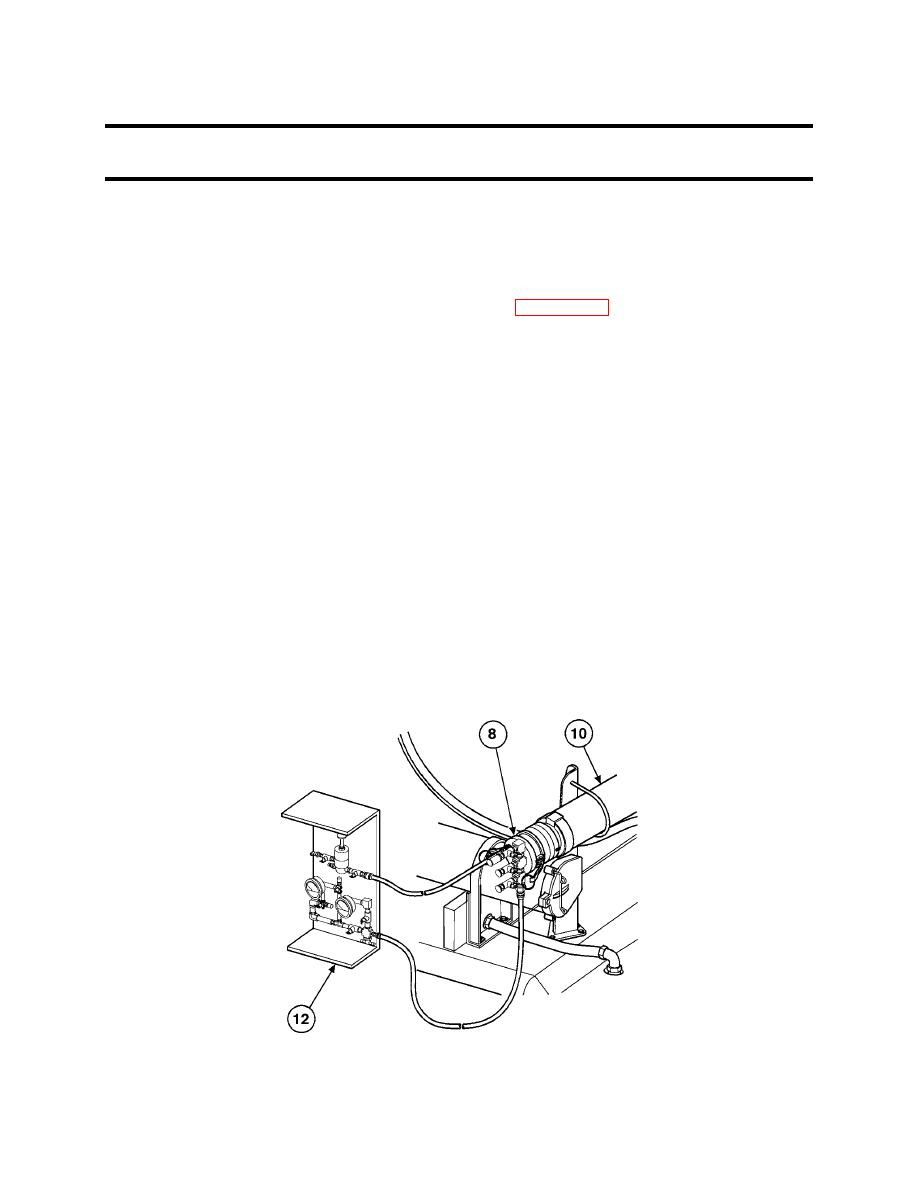
Look for leaks in vapor vent line (10); check vapor vent hood (7), vapor vent hose (32), and pipe
joints (33).
11.
Return tank and piping system to normal atmospheric pressure by opening G valve (28) and
emergency valve A (25).
12.
Repair any leaks found in vapor vent line (10) (refer to WP 0122 00). Restart test at step 1.
13.
Return vapor vent line (10) to atmospheric pressure by opening draincock valve (20) of regulator
assembly (12).
14.
On regulator assembly (12), close draincock valve (20) and monitor gage (30) for 5 minutes.
15.
If no increase in pressure is indicated on gage (30), vapor vent valve (5) is functional. Go to step
18. If there is an increase in pressure more than 0.5 in. wc, vapor vent valve (5) is leaking. Go to
step 16.
16.
Return vapor vent line (10) to atmospheric pressure by opening draincock valve (20) of regulator
assembly (12).
17.
Repair any leaks found in vapor vent valve (5). Restart test at step 1.
18.
Return tank and piping system to normal atmospheric pressure by opening G valve (28) and
emergency valve A (25).
19.
Remove coupling assembly (8) from vapor vent line (10). Install coupling assembly (8) on
discharge port of valve B (34). Install a closed cap on the open vapor vent line (10).
20.
Open emergency valve A (25). Pressurize tank and piping system according to steps 3 thru 5 and
then continue with step 21.
0168 00-7
|
||
|
||


