
| Tweet |

Custom Search
|
|

|
||
 TB 9-2330-330-14&P-1
INITIAL INSTALLATION (continued)
NOTE
Do not fully tighten capscrews or clamping screws until armor is properly
positioned and aligned on piping frame assembly.
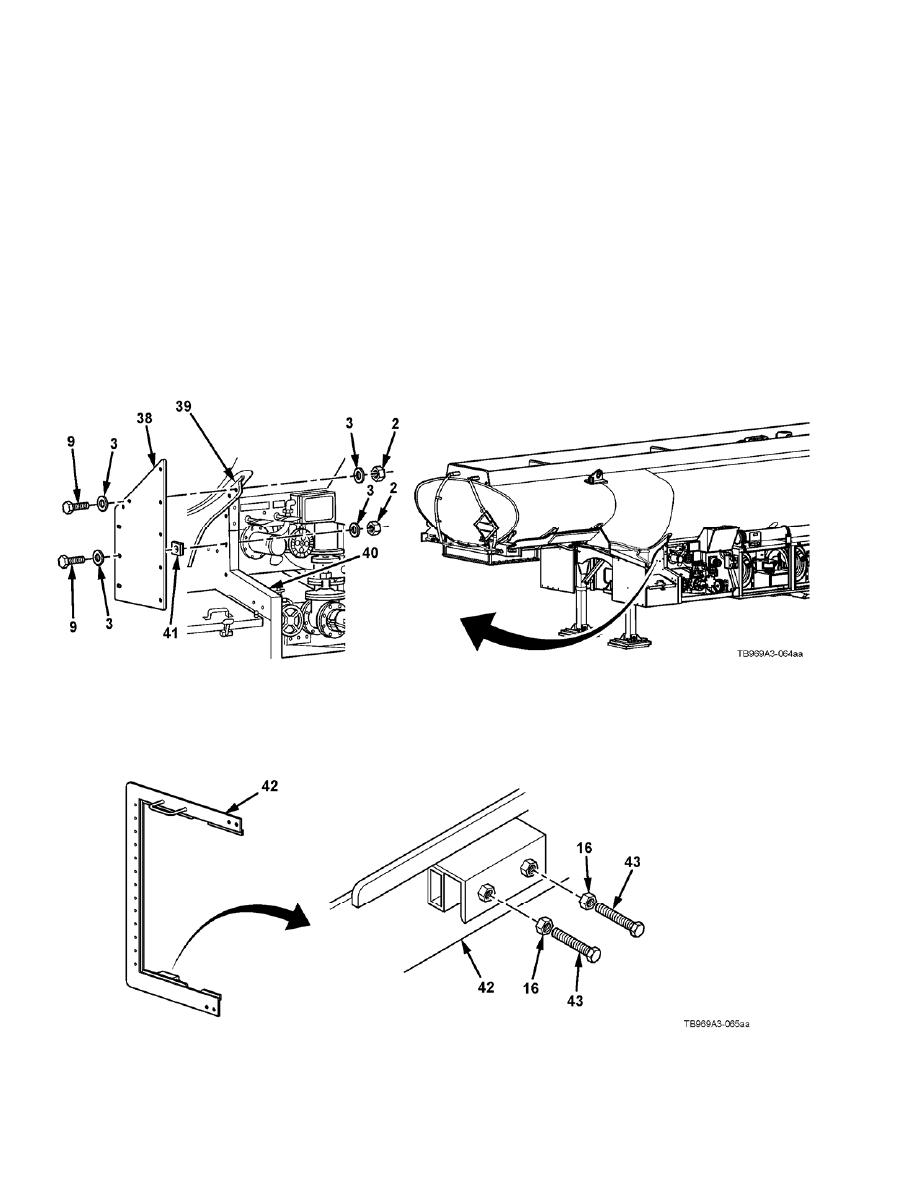
49. Position support plate (38) on crossmember (39). Align holes of support plate (38) with existing
holes of crossmember (39) and install with four flat washers (3), two capscrews (9), and two
self-locking nuts (2). Do not fully tighten hardware.
50. Align slotted holes of support plate (38) with existing holes of piping frame assembly (40) and
install with six flat washers (3), three capscrews (9), three shims (41), and three self-locking nuts
(2). Do not fully tighten hardware.
51. Install two capscrews (16) and two jam nuts (43) on front left door frame (42). Do not fully
tighten hardware.
4-20
|
||
|
||


