
| Tweet |

Custom Search
|
|

|
||
 TB 9-2330-329-14&P-1
INITIAL INSTALLATION (continued)
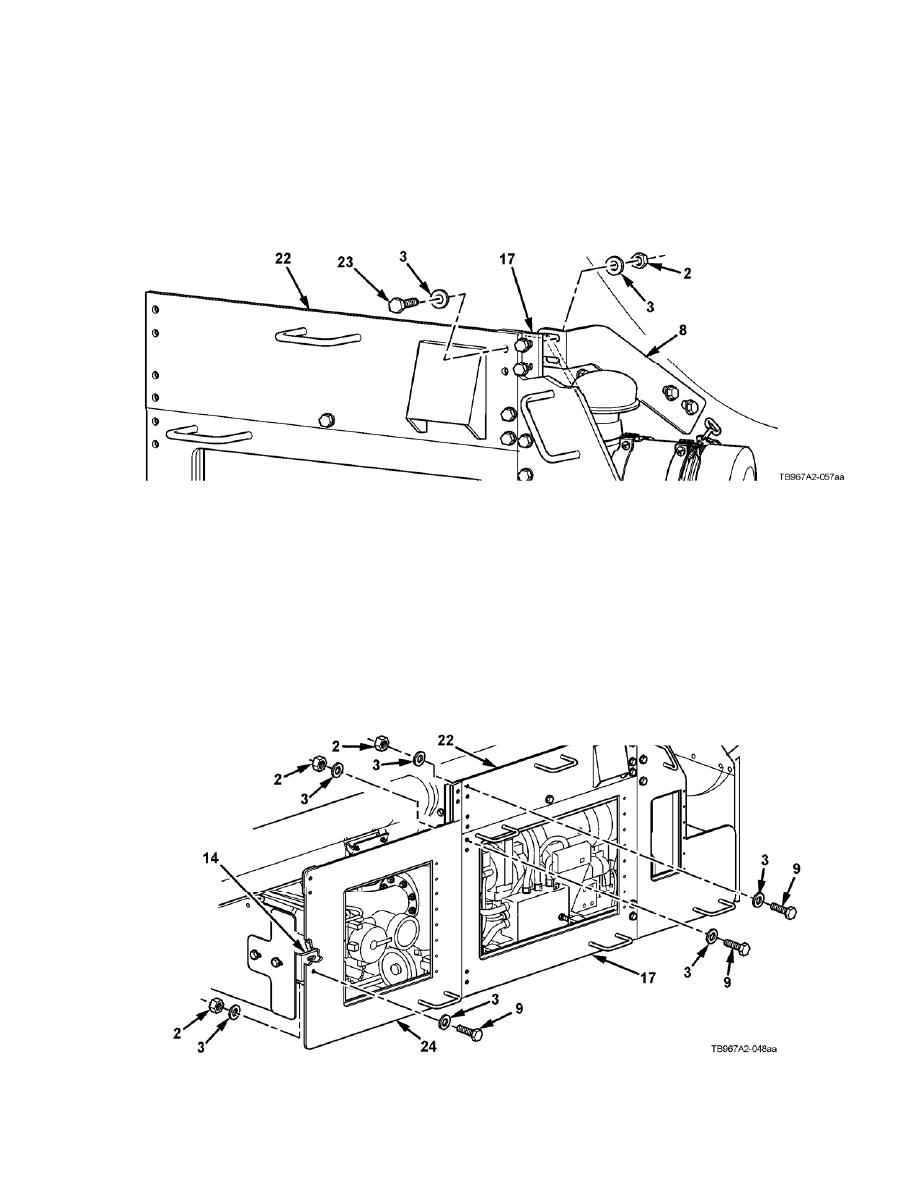
16. Extend front bracket (8) to meet front panel D (22) and front panel B (17) and install with four flat
washers (3), two capscrews (23), and two self-locking nuts (2).
17. Tighten all front panel D (22) and front bracket (8) hardware. Torque self-locking nuts
to 55-65 lb-ft (75-88 Nm).
18. Position front panel C (24) on front panel B (17). Align holes of front panel C (24) with holes in
front panel B (17) and install with eight flat washers (3), four capscrews (9), and four self-locking
nuts (2). Do not fully tighten hardware.
19. Install front panel D (22) on front panel C (24) with eight flat washers (3), four capscrews (9),
and four self-locking nuts (2). Do not fully tighten hardware.
20. Expand angle brace (14) to meet front panel C (24) and install with four flat washers (3), two
capscrews (9), and two self-locking nuts (2). Do not fully tighten hardware.
4-11
|
||
|
||


